Creating a Case in E-Verify
Instructions on how to create and submit a case using Namely's E-Verify integration.
OVERVIEW
E-Verify is a web-based system that allows enrolled employers to confirm the eligibility of their employees to work in the United States. With Namely’s E-Verify integration, you can create and submit cases right from within Namely and get immediate confirmation of a candidate’s work eligibility.
This article contains information on submitting cases in E-Verify to confirm a candidate’s work eligibility. For information on setting up the E-Verify integration, see Enrolling in E-Verify.
Refer to this video: Creating a Case in E-Verify
ACCESSING E-VERIFY
Users with the required permission configuration can access E-Verify by clicking Manage E-Verify on the Namely homepage.
TIP:
If you don’t see the Manage E-Verify button, or you get an error when you click it, you may not have the required user permissions to use E-Verify. Visit Enrolling in E-Verify for more information on E-Verify permissioning.
Case List
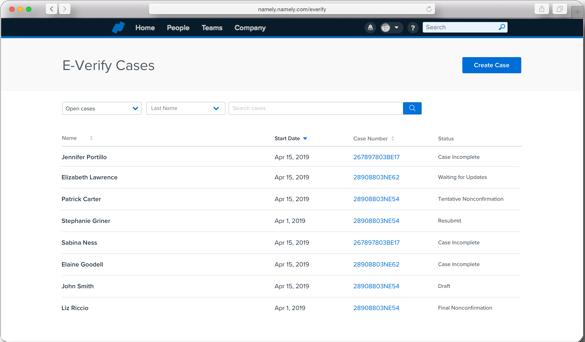
The case list displays cases you have created through Namely’s E-Verify integration, including the:
-
Employee’s full name
-
Employee’s start date
-
Case number
-
Case status
Filters
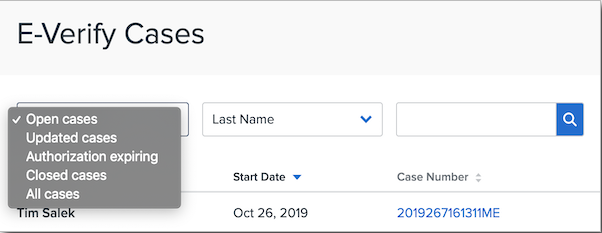
You can filter the case list by the following options:
-
Open cases: The default filter view. Filters for cases with any status except Closed.
-
Updated cases: Filters for cases updated by external systems
-
Queued cases are updated by E-Verify
-
Manual Review cases are updated by DHS
-
Referred cases are updated by DHS and/or SSA
-
-
Authorization expiring: Filters for cases for which the work authorization document submitted by the employee is expiring within 90 days
-
Closed cases: Filters for closed cases
-
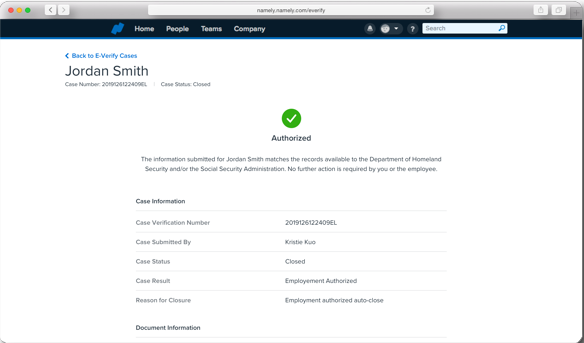
Note: Authorized cases are automatically closed and will display when filtering by Closed cases, but with a status label of Authorized.
-
-
All cases: Displays all cases created in Namely’s E-Verify integration
Search
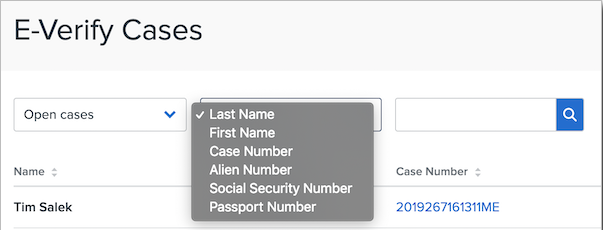
You can search specific fields in a case, including:
-
Last name
-
First name
-
Case number
-
Alien number
-
Social security number
-
Passport number
Search queries respect any filters that are applied to the case list, so if you have difficulty finding a specific case, make sure you are using the appropriate filter option.
To view the status of any case, click on the case number.
Download a Report of Your Cases
To download a CSV file of all your submitted E-Verify cases from a specified date range:
-
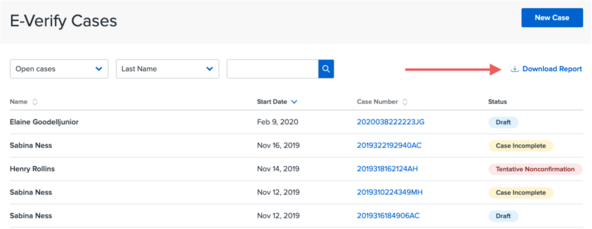
On the Case List page, click Download Report.
-
Enter a date range you want to pull cases from.
-
Click Download.
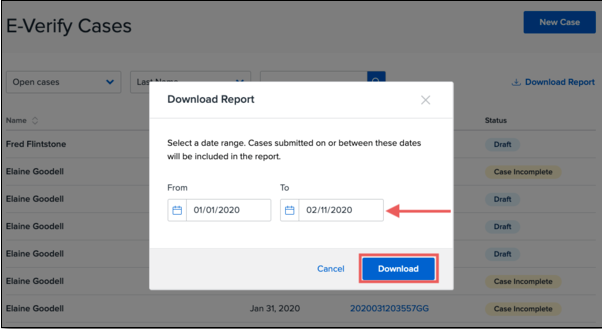
Please note, only submitted cases will be included. Draft cases will not be included in this report.
CREATING A CASE IN E-VERIFY
To create a new case in E-Verify, click Create Case.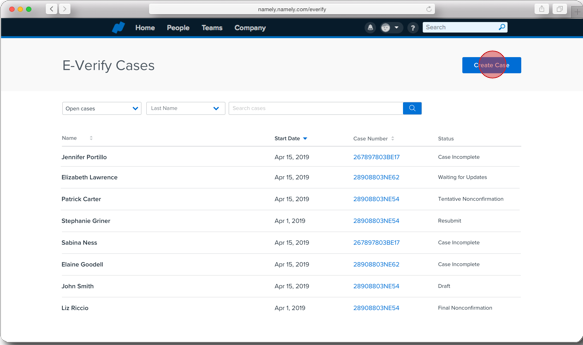
Step 1: Employee Information
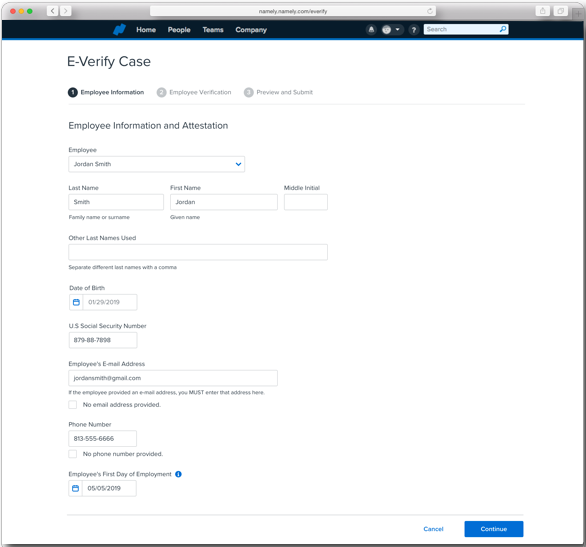
On the Employee Information and Attestation screen:
-
Enter the candidate’s name and select them from the Employee dropdown.
TIP:
The employee’s company email address displays next to their name in the dropdown menu to help you distinguish between employees with the same name.
-
After selecting the employee’s name, E-Verify pre-populates fields on their case form based on the information entered on their Namely profile, including:
-
First Name
-
Last Name
-
Middle Initial
-
Date of Birth
-
Social Security Number
-
If entering the SSN manually, you must enter the required dashes in the employee SSN or you’ll receive an error when you attempt to move past step 2.
-
-
Employee Phone Number
-
Employee Email Address
-
The Employee Email Address field pre-populates the employee’s personal email address. If an email address was provided on the employee’s I-9, this field must exactly match the provided email address.
-
-
Employee’s First Day of Employment
-
-
Once all required fields have been entered, click Continue to move to step 2.
TIP:
If an employee’s information doesn’t pre-populate, these fields might not be filled out on the employee’s profile, or you might not have View access to the fields in your assigned field group bundle.
Before moving to step 2, E-Verify looks for previously submitted cases sharing the same social security number. If any are found, we recommend you continue with the open cases, if possible. If a new case must be submitted, you’ll have to provide a reason for creating a duplicate case to continue.
Step 2: Employee Verification
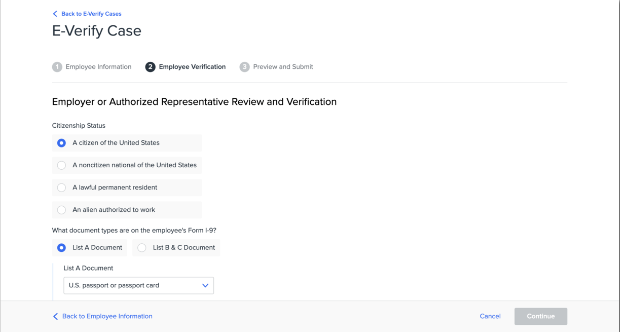
On the Employer or Authorized Representative Review and Verification page, enter the following information provided with the employee's I-9 form:
-
Select a Citizenship Status for the employee.
-
Select the document types the employee submitted.
-
After you have selected the provided document types, click Save and Continue.
TIP:
If you exit the case creator at any time in steps 1 and 2, the case will not be saved. Clicking Continue in step 2 creates the case in E-Verify and moves it to Draft status.
Step 3: Preview and Submit
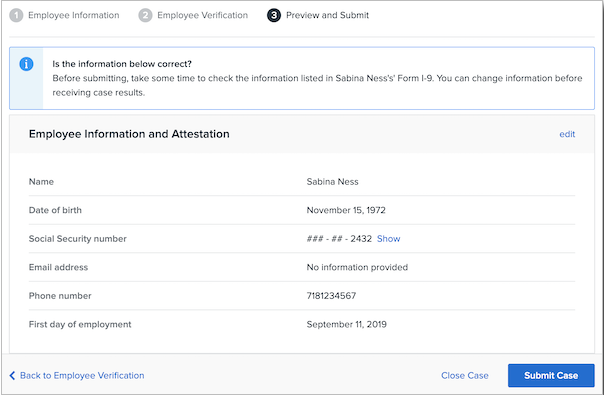
In step 3, review the information you entered in steps 1 and 2. If you need to make any changes, click Edit next to the appropriate section.
TIP:
If you selected List B & C documents for the employee in step 2, only one of the documents will display in step 3 when you review your draft case before submitting it. However, both documents will be submitted.
Once you have reviewed and confirmed all provided information, click Submit Case.
Case Statuses
After completing step 3 and submitting your draft case, there are 10 potential case result statuses:
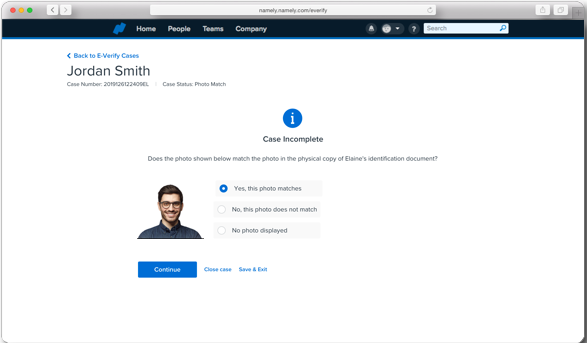
Photo Match: Requires employers to compare a photo of the employee shown in E-Verify to the photo on the physical copy of the employee’s identification documents and determine whether they are the same person.
Scan and Upload: Requires employers to scan and upload a photo of the employee’s passport ID page (the page with their photo) and passport barcode page. Other documents may also require scanning—in these cases, scan and upload the front and back of the document.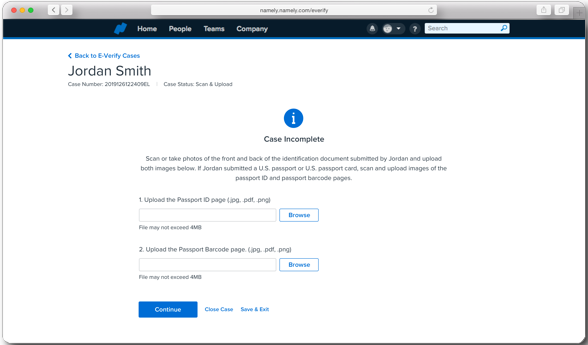
Unconfirmed Data: Require employers to confirm the values entered for specific fields in the case form by comparing them to the employee’s physical Form I-9.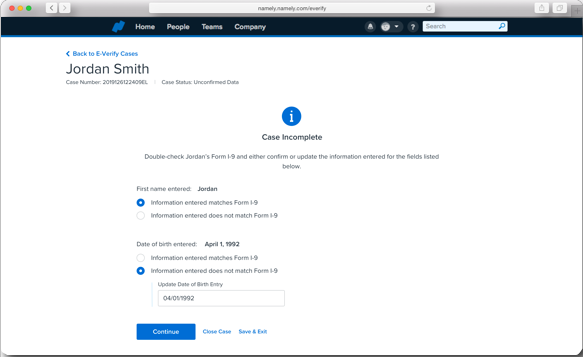
Pending Referral: These cases have resulted in a Tentative Nonconfirmation Case (TNC) result for the employee. The employer must download, print, and provide the Further Action Notice (FAN) PDF to the employee. This document contains next steps and timelines if the employee decides to manually resolve the case by contacting the DHS and/or SSA in hopes of employment authorization. TNCs can be issued by one or both federal entities.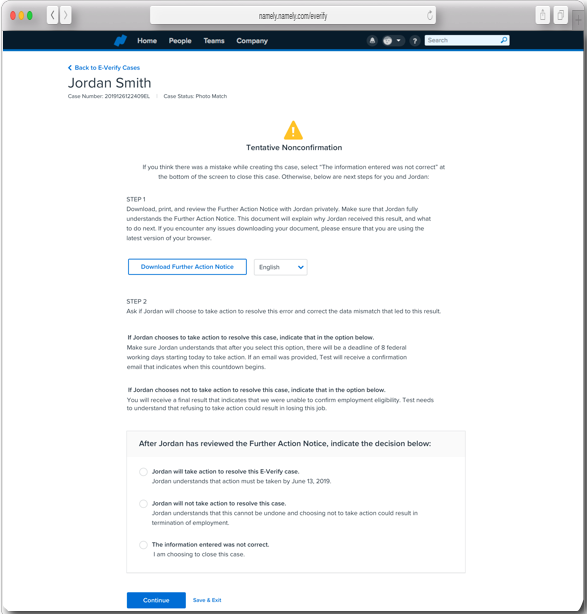
Referred: These cases have been referred to the DHS and/or SSA. The employer must download, print, and provide the Referral Date Confirmation (RDC) PDF to the employee. No further action is required by the employer once the FAN and RDC PDFs have been provided to the employee.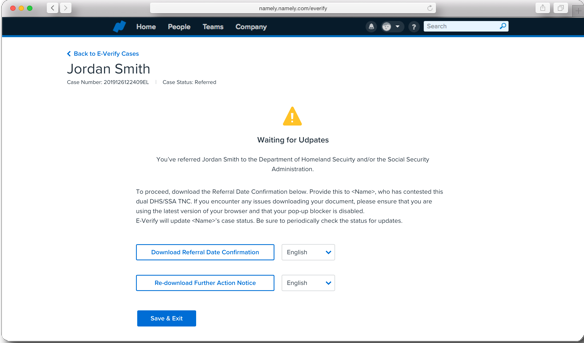
Final Nonconfirmation: Cases receiving this status inform the employer that the employee is not authorized to work in the United States. Employers are legally obligated to terminate employees who receive this case result.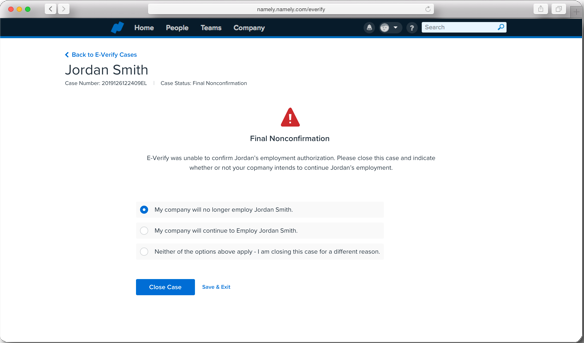
Queued: Pending action from E-Verify’s system—no action required for the moment. Periodically check the Updated Cases filter for changes to the case status.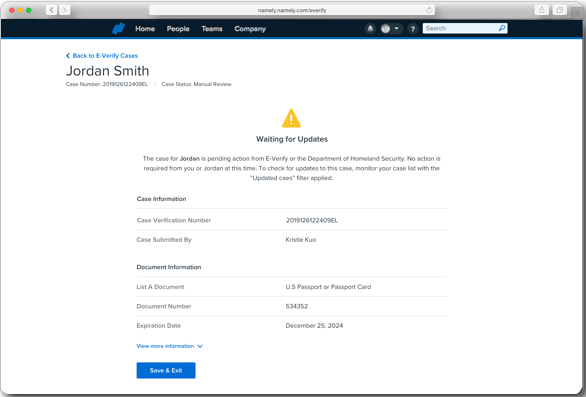
Manual Review: Pending action from the DHS—no action required for the moment. Periodically check the Updated Cases filter for changes to the case status.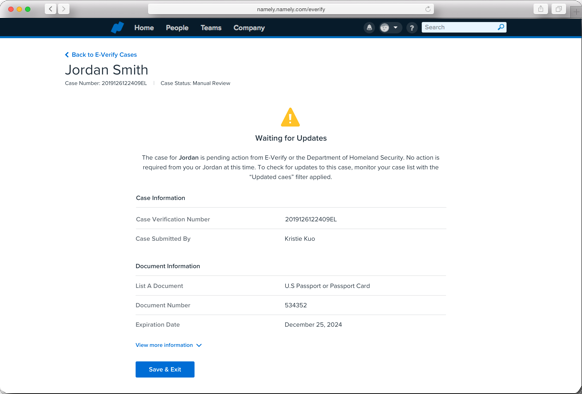
Close and Resubmit: Cases in which the employer has been instructed to close the case for technical or other reasons.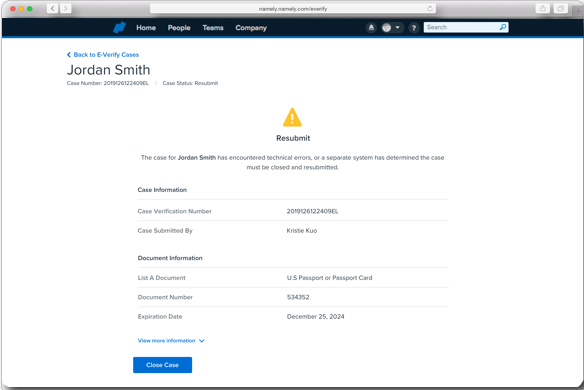
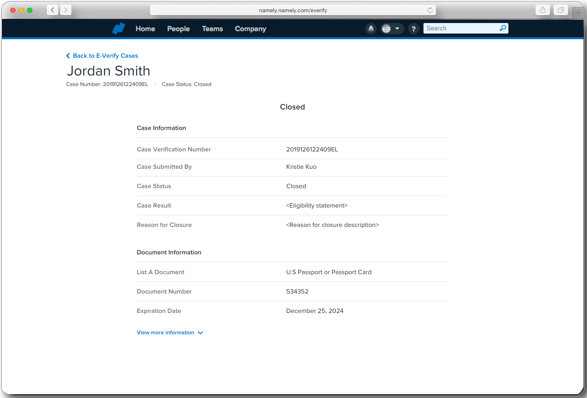
Closed: Includes cases that resulted in authorized employment. Cases resulting in authorized employment are automatically closed by E-Verify. All created and submitted cases should eventually be closed as a best practice.